|
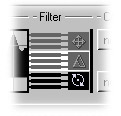
 The Filter section is where you decide which channels of the source object's data
you're going to use. With channels I mean the objects X, Y and Z position, the X, Y and Z scale
and the H, P and B rotation. So an object has nine channels in
total. Since it's possible with puppeteer to link different source
channels to different destination channels, both the source and
the destination object have their own filter section. The Filter section is where you decide which channels of the source object's data
you're going to use. With channels I mean the objects X, Y and Z position, the X, Y and Z scale
and the H, P and B rotation. So an object has nine channels in
total. Since it's possible with puppeteer to link different source
channels to different destination channels, both the source and
the destination object have their own filter section.
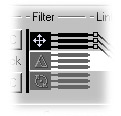
 The source object's filter is displayed in the Puppeteer dialog
as a set of nine black lines running out of the coordinates section.
Each of these lines stands for a single channel, and runs, via
the Link section and the Curve section, to the destination's filter
section. You turn on or off a channel by clicking on the elongated
rectangles lying on top of these 'cables'. You can also turn them
on and off per three by clicking on the larger black labels, so
you can turn on or off for example all three scale channels with
one click. The order of the channels is the same as in the Coordinates
Manager, so X, Y and Z position, X, Y and Z scale and H, P and
B rotation, and they are labelled per type with the same icons
you use in Cinema4D's view window. The source object's filter is displayed in the Puppeteer dialog
as a set of nine black lines running out of the coordinates section.
Each of these lines stands for a single channel, and runs, via
the Link section and the Curve section, to the destination's filter
section. You turn on or off a channel by clicking on the elongated
rectangles lying on top of these 'cables'. You can also turn them
on and off per three by clicking on the larger black labels, so
you can turn on or off for example all three scale channels with
one click. The order of the channels is the same as in the Coordinates
Manager, so X, Y and Z position, X, Y and Z scale and H, P and
B rotation, and they are labelled per type with the same icons
you use in Cinema4D's view window.
 If you have feedback turned on in the source object's coordinates settings, the filter
area of the source object is also where you decide to what movements
the source object should be limited. If you want it to only move
in Y, turn off all channels except the Y position, being the second
cable from the top. If you have feedback turned on in the source object's coordinates settings, the filter
area of the source object is also where you decide to what movements
the source object should be limited. If you want it to only move
in Y, turn off all channels except the Y position, being the second
cable from the top.
 Another thing to keep in mind is that an unconnected cable can still be turned on! It's easy to always keep all channels opened, and use the link section to decide which ones actually get used, but this is not the preferred method. First off, it takes more time (though really little) because Puppeteer will check channels it doesn't need to check. Second, the feedback option won't work correctly. It will still think it should be able to move on all axes, since they're all turned on, even though they don't actually send out any data. So always try to make sure that channels that are not used are actually turned off in the filter section. If the cable is black, it's still turned on, even when it is not connected to anything. Only when it's gray it is really turned off. *) Another thing to keep in mind is that an unconnected cable can still be turned on! It's easy to always keep all channels opened, and use the link section to decide which ones actually get used, but this is not the preferred method. First off, it takes more time (though really little) because Puppeteer will check channels it doesn't need to check. Second, the feedback option won't work correctly. It will still think it should be able to move on all axes, since they're all turned on, even though they don't actually send out any data. So always try to make sure that channels that are not used are actually turned off in the filter section. If the cable is black, it's still turned on, even when it is not connected to anything. Only when it's gray it is really turned off. *)
|
|
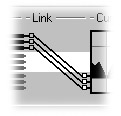
 Puppeteer's Link section is where you define how you link the source object's channels to the destination object's channels. It allows you, for example, to send the source object's X position to the destination object's P rotation, while sending the Y position to the Z scale. It does this by drawing cables from one channel to another. There are a few standard methods to connect source to destination, plus a fully flexible Patchbay method, which actually allows you to draw the cables by hand. These methods can be found in the popup-menu in the lower-left portion of the Puppeteer interface. There are five methods: Parallel, Averaged, Channeled, First Found and Patchbay. With the exception of Averaged, all methods can be simulated with the Patchbay method, though in a lot of cases there's no need to do so. They're simply implemented because they offer quick solutions for most uses, without the need to manually define the exact linking. Try out the methods, and watch the cables update to get a rough idea of how they work. Puppeteer's Link section is where you define how you link the source object's channels to the destination object's channels. It allows you, for example, to send the source object's X position to the destination object's P rotation, while sending the Y position to the Z scale. It does this by drawing cables from one channel to another. There are a few standard methods to connect source to destination, plus a fully flexible Patchbay method, which actually allows you to draw the cables by hand. These methods can be found in the popup-menu in the lower-left portion of the Puppeteer interface. There are five methods: Parallel, Averaged, Channeled, First Found and Patchbay. With the exception of Averaged, all methods can be simulated with the Patchbay method, though in a lot of cases there's no need to do so. They're simply implemented because they offer quick solutions for most uses, without the need to manually define the exact linking. Try out the methods, and watch the cables update to get a rough idea of how they work.
 The Parallel method simply sends the channels straight through, so X position
to X position, Z scale to Z scale, etc. Turning off a channel
in either the source or the destination filter results in the
link on that channel disappearing. The Parallel method simply sends the channels straight through, so X position
to X position, Z scale to Z scale, etc. Turning off a channel
in either the source or the destination filter results in the
link on that channel disappearing.
 The Averaged method is a special case. It averages all channels which are
turned on in the source filter, and sends the result to all channels
turned on in the destination filter. So all destination channels
receive the exact same signal. This is a method which can be used
to have a complex movement (for example a translation in both
Y and Z, plus a rotation in H) affect another complex movement
(for example a scale in X and Y, while rotating in B). You can,
of course, simply use a single source channel for multiple destination
channels, or vice versa. For example, with this method it's easy
to create a slider object or control object, whose Y position
controls a destination object's H, P and B rotation at the same
time. The Averaged method is a special case. It averages all channels which are
turned on in the source filter, and sends the result to all channels
turned on in the destination filter. So all destination channels
receive the exact same signal. This is a method which can be used
to have a complex movement (for example a translation in both
Y and Z, plus a rotation in H) affect another complex movement
(for example a scale in X and Y, while rotating in B). You can,
of course, simply use a single source channel for multiple destination
channels, or vice versa. For example, with this method it's easy
to create a slider object or control object, whose Y position
controls a destination object's H, P and B rotation at the same
time.
 The Channeled method links up the source and destination channels in another
way. It looks at the source filter for the first set of three
channels with at least one of them turned on, and connects them
to all the destination's channels, X to X, Y to Y and Z to Z.
This way, the information sent through will always respect it's
own axis (X, Y or Z), and will always originate in only the position,
scale or rotation values of the source object. The Channeled method links up the source and destination channels in another
way. It looks at the source filter for the first set of three
channels with at least one of them turned on, and connects them
to all the destination's channels, X to X, Y to Y and Z to Z.
This way, the information sent through will always respect it's
own axis (X, Y or Z), and will always originate in only the position,
scale or rotation values of the source object.
 The First Found method simply looks for the first found active channel in the
source filter, and link it to the first found active channel in
the destination filter. Then it looks for the next active channels
on both sides and link them up as well. So with this method it
is impossible to get crossed cables. The First Found method simply looks for the first found active channel in the
source filter, and link it to the first found active channel in
the destination filter. Then it looks for the next active channels
on both sides and link them up as well. So with this method it
is impossible to get crossed cables.
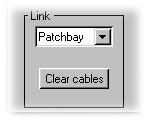
 Finally, the Patchbay method is the most flexible of all, as it allows you to define
any sort of linking simply by hand. Once you activate the patchbay
method, you'll see that the cables will remain as they were in
the last selected method (with the exception of the Averaged method)
so it's a good idea to start with one of the other methods, then
switch to Patchbay for the final tweaks. Also, there'll be a button
made active below the popup menu, called Clear cables. Pressing this button simply removes all cables in the Link section
so you can start off with a clean slate. Finally, the Patchbay method is the most flexible of all, as it allows you to define
any sort of linking simply by hand. Once you activate the patchbay
method, you'll see that the cables will remain as they were in
the last selected method (with the exception of the Averaged method)
so it's a good idea to start with one of the other methods, then
switch to Patchbay for the final tweaks. Also, there'll be a button
made active below the popup menu, called Clear cables. Pressing this button simply removes all cables in the Link section
so you can start off with a clean slate.
 Defining the links in Patchbay mode is not more complicated than clicking on an active channel in the right-hand side of the link section (one of the little white squares) and, while holding the mouse button, dragging it to an active channel on the left side of the link section (one of the little grey squares). You'll see that the cable you're dragging will be automatically popping in place as soon as your mouse is near an active channel. Release the mouse, and the cable will be placed. Releasing the mouse without making such a connection will result in the cable disappearing from the link section, allowing you to clean up your cables just as you like it. Defining the links in Patchbay mode is not more complicated than clicking on an active channel in the right-hand side of the link section (one of the little white squares) and, while holding the mouse button, dragging it to an active channel on the left side of the link section (one of the little grey squares). You'll see that the cable you're dragging will be automatically popping in place as soon as your mouse is near an active channel. Release the mouse, and the cable will be placed. Releasing the mouse without making such a connection will result in the cable disappearing from the link section, allowing you to clean up your cables just as you like it.
 Due to the nature of Puppeteer, it's logically not possible to
link two source channels to one single destination channel. It
is, however, quite possible to link one source channel to two
seperate destination channels! So you can have the source object's
Y position influence bot the destination object's Y position and
H rotation! This is just like using the Averaged method with only
one source channel turned on. Due to the nature of Puppeteer, it's logically not possible to
link two source channels to one single destination channel. It
is, however, quite possible to link one source channel to two
seperate destination channels! So you can have the source object's
Y position influence bot the destination object's Y position and
H rotation! This is just like using the Averaged method with only
one source channel turned on.
|


